Where do Babies Come From?
How We Breed Koi
Most folks do not realize what exactly is involved in producing quality Koi.
I have always said that it would be much easier if I simply bought and resold Koi as opposed to breeding them my self. I can say without a doubt it would be the best business decision and much more efficient because there is much less labor and capital involved in reselling alone. There would also even be a profit made most likely! However, the breeding part is in my blood and is the primary reason I am in the Koi business.There is nothing like the feeling of knowing you produced them. Everyone who knows me knows I am not in this business for the money. You have to love it, and I do for sure.
Many people think that all you need to do is putt a male and female Koi together and presto, you have thousands of Koi fry to sell and make large profits from. Let’s face it, a large Koi can produce up to a half a million eggs, so it must be a piece of cake! Let me take some time now to shatter this misconception. This will be a multi-part article. The first part will be about preparing the mud ponds, and the second part in the next newsletter will be about the spawning itself and all that goes with it. In the third part we will discuss the fry and the culling process and everything that is concerned with growing them out. It won’t take you long to realize why Koi can demand the prices they do.
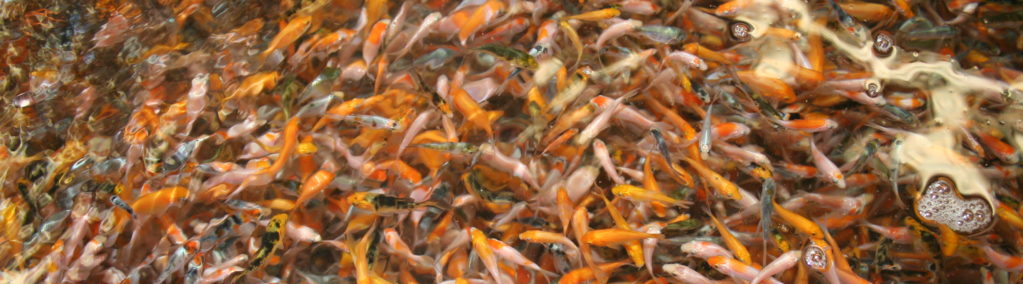
Now knowing that even the smallest breedable Koi at 8″-10″ will lay upwards of 5000 to 10,000, eggs and the largest of Koi upwards up to one half million eggs, it it needless to say you need lots of room to raise this quantity of fry. This is almost impossible to do in a tank situation and this is why mud ponds from 1/8 acre and larger are needed. So first you have to have the acreage to house mud ponds. This is your first major capital investment…land!
Now assuming you have the land, you must construct the mud ponds. Now, as you may imagine, there is much more to the design of building a mud pond than simply digging a hole and filling it with water. We won’t get into all of that, but again it is another major investment. On top of this investment you must have the water supply to fill and maintain them. This means you must have springs, wells, and/or be able to tap into a local river or stream. If the latter, you will also need extremely expensive sterilization and filtering equipment to be able to sterilize the wild water prior to it entering your ponds. Without this equipment to pretreat the water, you will bring in foreign pathogens and parasites. This as well is not to mention the fact that even KHV (Koi Herpes Virus) is now found in many waterways of the USA. So as you can see, this sterilization is practically mandatory. Luckily, here at the farm I have just enough water supply from wells and springs to meet my current demands minimally. We do not use any water from outside the farm.
Now that you have an idea of the initial investment and knowledge required, let’s get back to the actual breeding and pond preparations.
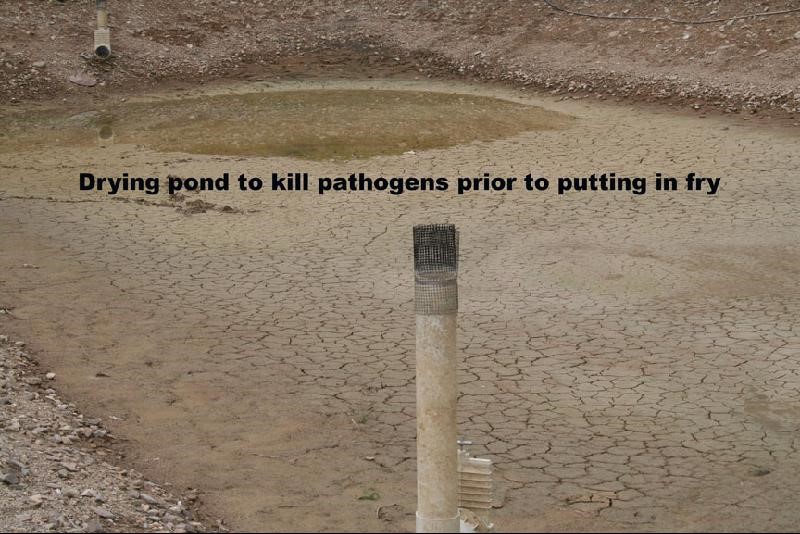
Prior to each breeding season the ponds have to be prepared for the fry. This starts by draining the ponds completely and letting them dry until the mud cracks as shown in the photo below. This helps reduce the number of pathogens that live in the water and the mud, and therefore give the fry a better start in life. The drying, depending on the weather of course, will take about a month at least, and sometimes they are left to dry all winter long.
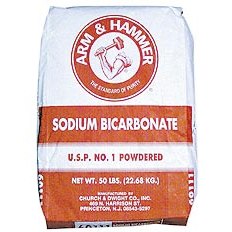
After the pond has dried sufficiently, we usually add lime to the soil of the pond bottom. This will improve the alkalinity (kH) of the pond and aid in maintaining water quality and stable pH. This as well as fertilization will greatly increase the carrying capacity of each pond. After the soil has been dried and prepared we partially fill the ponds with clean water to about a foot or two in depth.
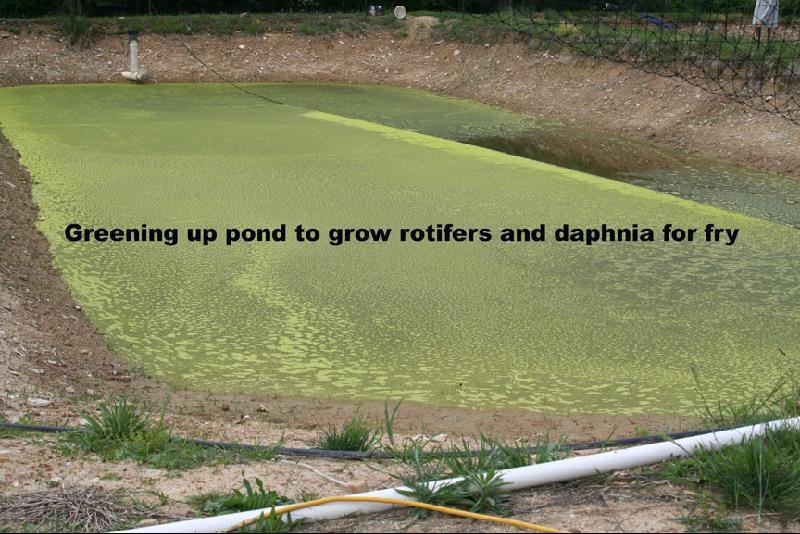
Now comes the fertilization part of preparing the ponds. This is a critical step in preparing the ponds, as we need to grow live food in the form of rotifers firstly and later, after the fry are a few weeks old, copepods and Daphnia specifically. This is especially important for the first few weeks of their lives. The special live rotifers we cultivate in this “pond soup” are critical to the optimal growth and development of the fry when they are first born and begin eating after a few days. As well, algae blooms form and are what causes the green tint you see in most ponds.
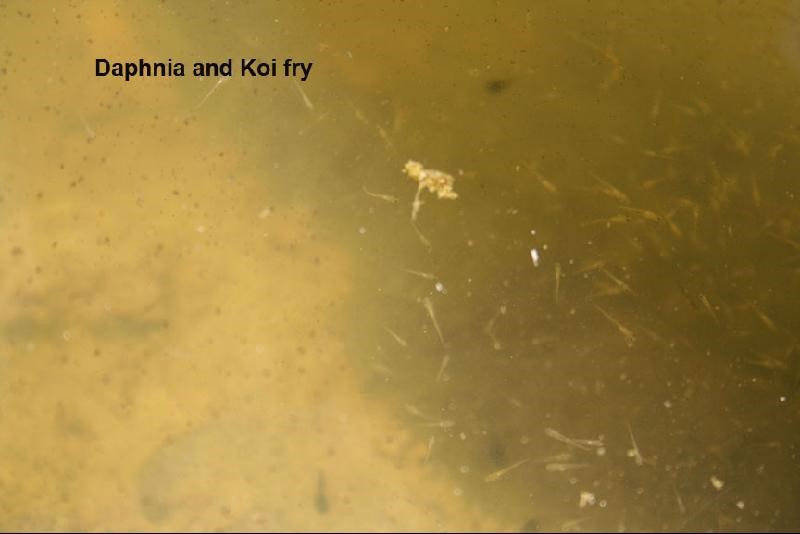
The fertilizer we use is an organic one. (The exact amount and type of organic fertilizer is a secret, but I will say it is a manure) By adding this fertilizer it promotes planktonic algae blooms as discussed. This is due to the added nitrates and other compounds in the manure that act as fertilizers and promote plant growth as the plankton is simply a tiny plant. As well, a “sort of ” fermentation process begins as the manure reacts with the water and sunlight. During the “sort of ” fermentation process certain bacteria cultivate. The rotifers then start to come as they feed on these bacteria. So as you can see, you need the bacteria first, which in turn stimulates the production of rotifers. After the rotifers come the copepods and other tiny critters like Daphnia that will feed on the rotifers. These Daphnia can feed the fry later on as the fry grow a little more. The fry have to achieve a certain size before they are large enough to eat them, however. We will discuss this in detail a little later on in this article. Below you can see some photos of Daphnia and rotifers. The specks in the photo with the fry are the Daphnia swimming all around. You can actually see the fry eating them.

In the case of this intensive aquaculture such as growing large numbers of fry, the algae bloom is to say the least “intense”. This bloom and bacterial culturing is the beginning of the food chain in the pond. Below you can see a greening ponds approaching full bloom.
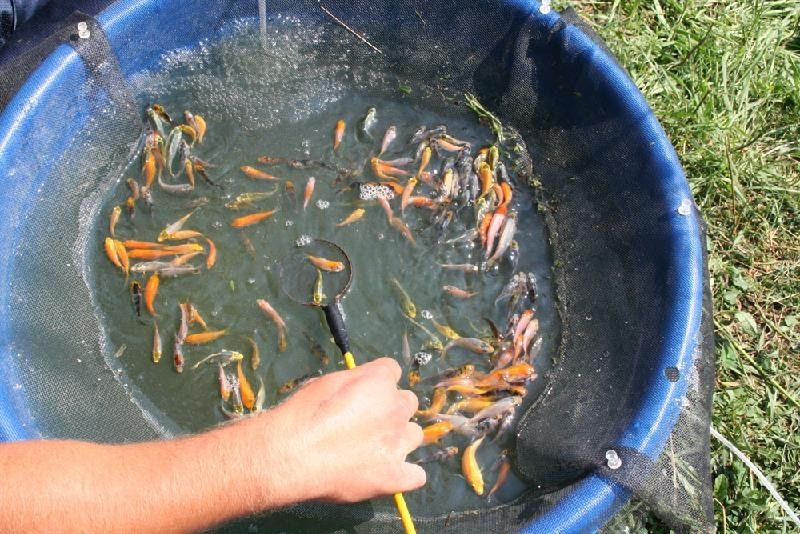
Now let’s pause here for a moment and discuss how all of this needs to be critically timed. If it is not timed correctly the process will fail, and you will have grown little to none of these critical live food for the fry. No food, and many of the fry will starve in the first few days of their lives as fish. Think about this as well. The weather has to be right in that there needs to be sufficient warmth and sunlight to start the fermentation and blooms. Too much rain or cloudy weather after filling with water and adding the fertilizer, and these things will not occur or not occur in a timely fashion. Meanwhile, all of this has to be timed with the readiness of the females to spawn as well. Here at the farm we use hormone injections to promote ovulation in the females. The males are always ready (as with human males) but the females need some artificial stimulation to be put “in the mood”. (just as with human females). Now even though these injections can induce ovulation within 8 to 12 hours (depending on the water temperature), the females still need to be ready or close to ready to ovulate naturally. In other words, the eggs have to be mature enough to be viable when laid. Now there are scientific methods to determine the readiness of the eggs and the females, and there are the fish farmer method of determining this. Let’s discuss the scientific method.
The eggs of Koi have only one entrance hole (so to speak) that the sperm can enter and fertilize the eggs nucleus. In the early stages the nucleus of the egg is located inside and in the center of the egg. As the egg matures, the nucleus move closer and closer to the hole where the sperm can penetrate. This can all be investigated with the use of a microscope to determine the position of the nucleus in the egg. The more off center it is, the more ready the female. Samples of the egg can be gotten with the use of a catheter inserted in the vent of the female.The hollow tube of the catheter will hold some of these eggs so they can be taken out and put under the scope to determine the position of the nucleus.
Now the unscientific method most breeders utilize is to examine the abdomen and the vent. As the female becomes ready to spawn, the vent area can swell and become pinkish in color. This is not always the case, but it does apply quite often. As well, the abdomen will swell and become soft and squishy the more ready the female is to spawn.
Again, weather, moon phase, photo period (the duration of daylight in a day) and specifically the water temperature all play major roles in the female ovulation process. As you can see, some of these factors as well can be artificially manipulated. By housing the females indoors we can adjust the lighting to simulate the amount of daylight we need. In other words, we can have the lights on timers to come on and go off as we deem necessary. This usually means that in early spring we can have the lights inside stay on longer then the actual daylight hours during that time of year. We will discuss more of the details of spawning in the next article.
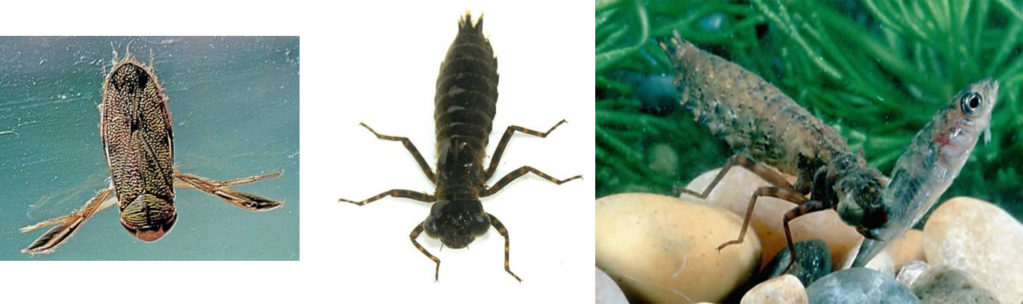
Now knowing all of this, let’s get back to the mud pond preparation. The other consideration in preparing them and growing the “live feed/good bugs” is the timing of getting the eggs or newly hatched fry in there before the “bad bugs” come. What are the “bad bugs”? Well, just about every aquatic insect there is prey on the fry or the eggs, so it is critical that the fry be hatched and to a certain size before these critters show up.The most common predatory insects I deal with are dragonfly nymphs, water boatman, water spiders, and whirligig beetles, but there are also many, many others that show up as well. Here are a few we discussed. Notice how the mouth of the dragonfly nymph can be extended out. Basically they sit camouflaged on the bottom and when a fry or even a fingerling up to one and one half inches swims by, they simply shoot out that mouth and grab them! These nasty bugs have eaten whole ponds of fry a few times here at the farm. Ponds can be treated with Dimilin to get rid of them , but this is dangerous as well, as you need to figure the gallons of the pond so as not to overdose it. The other photo is a water boatman. Yet another nemesis of mine here at the farm.
As discussed earlier, the Daphnia show up after the rotifers because they eat the rotifers. The trick here is to put the fry in the pond just as a few Daphnia start to show up. If you let the Daphnia come in force before the fry are added, then the Daphnia will eat all the rotifers, and the fry will have nothing to eat the first week or two. Once the fry are a week or two old, they should be big enough to eat the Daphnia.
Even assuming you do everything right up until this point, once the fry are growing you will eventually deplete the live food source and be forced to feed the fry a commercially prepared feed. These feed are usually at least 55% protein, and due to this fact they can easily contaminate the water if the fish are overfed. It is very tricky deciding how much feed to use that is enough to feed all the fry, but not use too much as to cause ammonia spikes and other water quality issues. You can easily kill thousands of fry if you get even the slightest water quality issues, and when you overcrowd the fry (as all breeders do) you must keep a very close eye on things. In future articles we will discuss the actual spawning process, as well as the growing and culling of the fry.

Written by John Fornaro, Hanover Koi Farms. ALL RIGHTS RESERVED BY HANOVER KOI FARMS, COPYRIGHT © 2017