Koi Wounds and Ulcers
If you have fish, then at some point you may have to treat a physical injury or wound caused by an infection. A wound that is caused by an infection is referred to as an ulcer and is usually bacterial in nature. Injuries, on the other hand, are just that. Fish can cause a physical break in the skin due to many reasons, just like we can injure ourselves. They can get scraped and banged up in a pond or tank while spawning, while flashing, or predators can injure them as well. Without treatment, these injuries can and will most likely get infected easily, and become ulcers at some point. Left untreated, these ulcers can lead to Dropsy, internal infections, and the eventual death of the fish. That is why it is important to tend to these wounds as soon as feasible before they get to a non- repairable state. In most situations they can easily be healed if attended to in a timely manner. Below I will try to give you a step-by-step tutorial on just how to do this, and what you will need to accomplish the task.
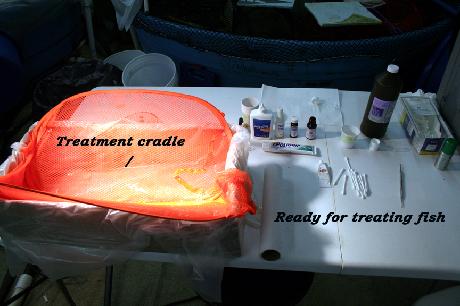
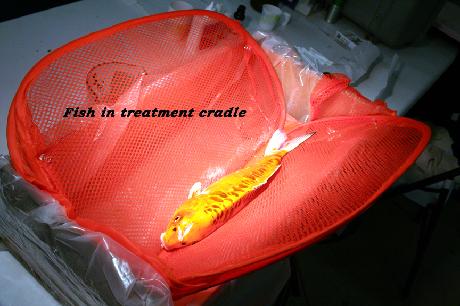
Pictured below is an easy setup that anyone can put together as a makeshift operating table. It is best to get everything ready prior to beginning any procedure. As you can see, I have all the things needed already in place, and within easy reach. You will also notice that I have a homemade cradle to hold the sedated patient for ease of working.

DIY Koi Ulcer Treatment Table
Step by Step
Before attempting to work on the fish, it is better to sedate it so you are not attempting to work on a moving, slimy object. This also prevents the fish or you from doing more damage if it were to be allowed to move, and/or flop about. Sedation is easily accomplished with a number of compounds mixed in water, but one of the most widely used by hobbyist is simply oil of cloves. Oil of cloves, or Clove oil can be purchased at any drug store.
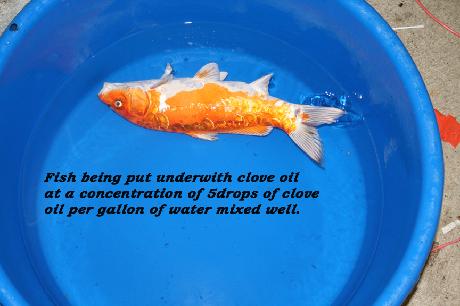
First get an adequately sized tub to accommodate the size fish you are doctoring. The example in the photos is the standard Koi show bowls that are readily available. You can, however, use just about any type of properly sized plastic Rubbermaid tub as well. The main thing is to have it sized so as not to allow the fish too much room to jump out.
Next put in only enough water to cover the fish, yet not deep enough that it can get momentum to jump out. Make sure that the water is dechlorinated if using tap water, and also make sure the temperature of the tub water is the same or within a few degrees of the water the fish originally came from. You do not want to cause temperature shock on an already ailing patient. In the photos below, I am utilizing five gallons of water. You should know the gallons you are using, as the clove oil needs to be applied and mixed into the water at a rate of five or so drops per gallon of water. So in the case of the five gallons in my tub shown, I used 25 drops of clove oil. Mix it well after adding. After mixing in the clove oil, put the fish in and leave it there until it just rolls over on its side and the breathing slows somewhat. This can take up to fifteen minutes or so sometimes.
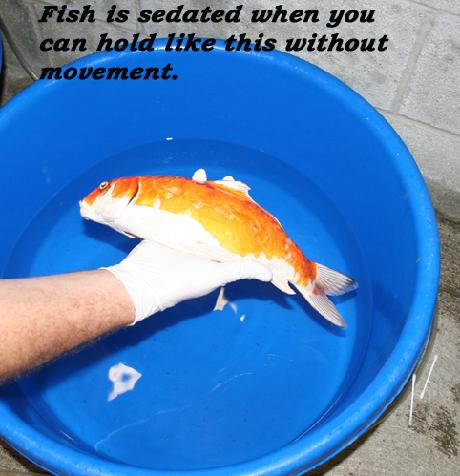
Once the fish rolls over, I use a simple test to see when it is sedated enough.. Simply pick the fish up as shown in the center of the body while on its side. If it lies motionless but there is still slow gill movement, then it is ready. If it flops while holding it, then simply put it back in the clove oil mixture for the amount of time needed so that you can hold the fish with any flopping. Of course, you do need to be careful not to over do it either, as with any sedation, overdosing it can be fatal. As well, you must also understand that there is always some risk in sedating fish. Just as with humans, very small percentages do not respond well to it and can even be killed. This is extremely rare, however, so I would not worry too much about it.
Once the fish is fully sedated it is time to move them to the table and lay them in the fish cradle. Depending on the type of cradle you use, it should be soft and it should be liberally wetted to avoid the cradle material stripping the slime coat from the fish. I use a water conditioner called Ultimate that has built in slime coat electrolytes, and it is very slimy to the touch. The sliminess keeps the cradle material from adhering to and stripping the slime coat. Lay the fish in the cradle in such a way that it is easy to work on the area of the fish that needs the attention.
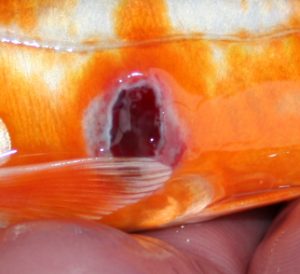
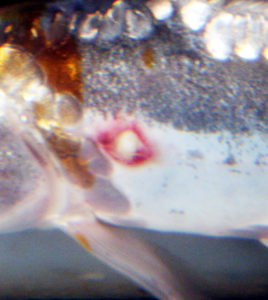
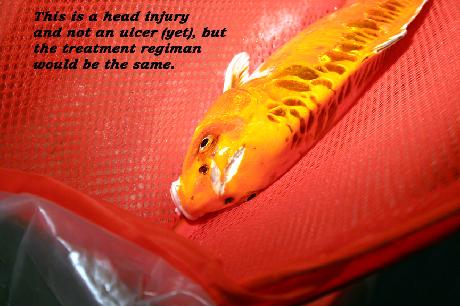
At this point you should have all the meds and equipment at close hand to be able to work quickly and efficiently. It helps as well if you have an assistant, but one person can do this. The first thing you need to do is closely inspect the fish for multiple wound sites and see just how deep and how infected they may be. The amount of damage and infection dictates exactly what I use as for medications, as well as how and in what order they are applied to each wound. However, until you get some experience you can simply follow step by step exactly how I have treated this fish. Once you learn more you can decide what to use as well as what order you administer it.
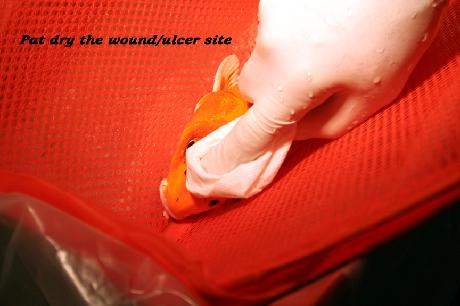
The next step would be to dab dry the wound site/sites as shown. This can be done during the inspection as well. This will help the meds adhere better and stay on longer to do their job.
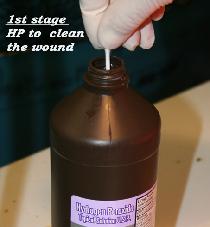
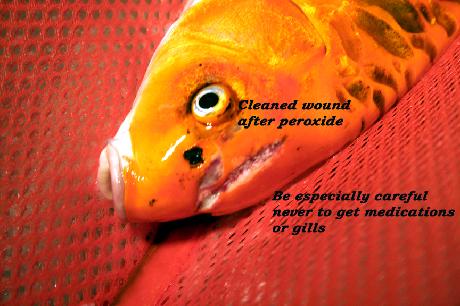
After the wound is examined and dried, I will usually always administer peroxide with a cotton swab. As with all of the aforementioned medications and treatments, it is important to try and keep them confined to the wound site. Try not to get these anywhere else on the fish, especially in the eyes or gills. At this stage you can and should use the swab to gently remove any loose scales or dead skin tissue around the wound site. They are just in the way of cleaning the wound and hide lots of bad bacteria under them as well.

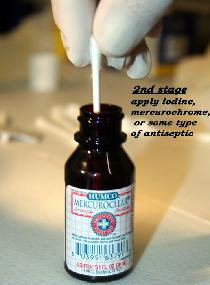
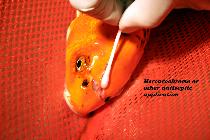
After you have cleaned the wound with the peroxide and allowed it to work in for 15 seconds or so, again gently dry the area with a soft cloth or paper towel. Next I like to use a strong treatment such as Mercurochrome or iodine to apply to the wound, and clean the area. These act to kill more bacteria, as well as cauterize the wound per se. I never usually apply these types of compounds after the initial treatment day, as they can at some point be a possible detriment to healing due to their tissue destroying properties. In other words, after this first series of treatments on the first day, I seldom use either one of these again. On occasion I will sometimes use them on the second series the next day that I treat. This is not too often, and is usually when there is no sign of healing or a worsening of infection to the wound site. By the second day any reddening seen on the first day should be lessened at this point. If not, I may apply these for the second and last time in most cases.
After the application of the iodine or Mercurochrome you should blow the area as dry as possible before moving on to the next step. Remember however that you are working with a sedated subject that may come to, so work at a fair a pace as feasible.
Now I like to apply some sort of gently but strong antibiotic cream to the site. Again be careful to keep it confined to the wound, but make sure to get full coverage of the wound/infected area. I sometimes use an ointment called Debride, which is made especially for this application on fish, but it can be expensive. You can, however, use any type of triple antibiotic cream such as Neosporin, and even create your own antibiotic paste.
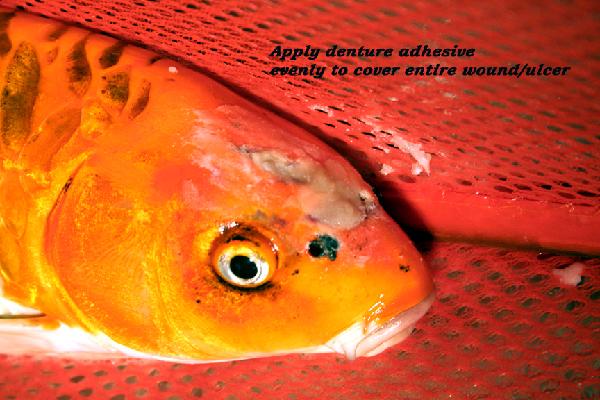
Most everyone has Neosporin in the house, especially if you have children. Quite often I make my own paste by mixing Neosporin with a powdered antibiotic like Tricide Neo/Neocide, and a paste type denture adhesive. Mix them together with varied amounts of each until it becomes very pasty, but of course keep the denture paste to a minimum as compared to the others. You only want to mix in enough of this denture paste to firm up the mixture and add to it sealing and adhesion properties. This paste consistency adheres much better to the wound as compared to Neosporin by itself. I suggest they be applied with your finger, as you have much more control and sensitivity in the application process. Whether it is a surface wound or a deeper one, you need to gently rub the paste into the wound. Again, let any loose dead skin or scales come off as you apply the paste. On deeper wounds you would apply the paste as to fill the wound hole completely and smooth it over at the skin surface. If you have ever applied drywall spakling, then that is a good comparison as to how to fill the wound and smooth it gently over the surface.

Next I will sometimes add one more layer of denture adhesive but in the powdered form. Simply apply as shown and blow off the excess. This can add another layer of protection, and help with the adhesion of the ointment mixture. I only do this to tougher wound sites usually however, so you don’t have to do this step unless you feel it is needed.


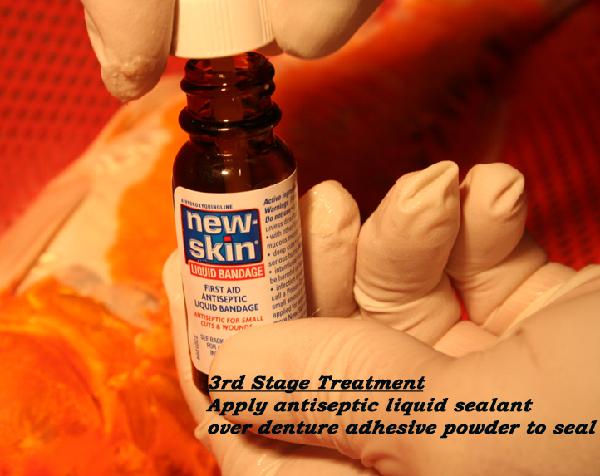
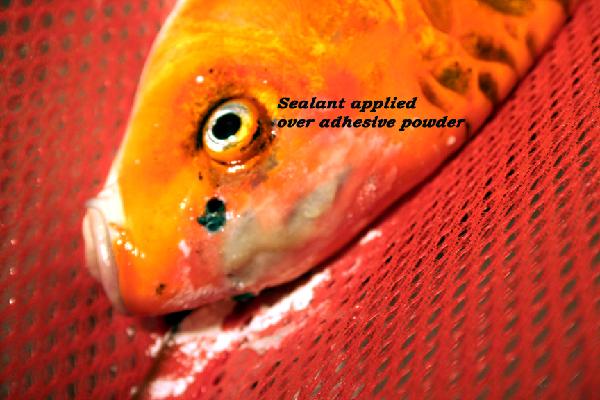
The final step is to apply a liquid type sealant or bandage. Simply spread a thin even layer over the entire site and extend just slightly beyond the wound area. This will give it some firm skin or scales to adhere to. Take as much time as you can , considering the fish is under sedation, and blow dry the liquid bandage as much as feasible. The drier the better before releasing the fish back to water.
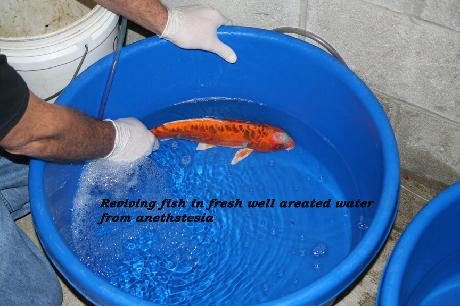
Now it is time to revive the fish. This is done by putting it in a tub of fresh water that is the same temperature as what the fish originally came from. You can as well take it right back to the tank or pond it was in to revive it there. Once you are at the pond or tank gently support the fish with both hands under the head and body, and just under the surface of the water. Now you can gently move the fish horizontally in a back and forth motion to manually move water through the gills. By doing this, you are flushing the clove oil out of the gills with the fresh water, and the fish should come around in a few minutes. Once the fish struggles to get loose from your hands, simply let it go. It may still go to the bottom and lay over, or roll over at mid depth, but not to worry, as it should upright itself very shortly after.
As there are many varied degrees of wounds, not everyone needs to be fully treated as the above. The minimal treatment I would ever apply to a wound or ulcer is iodine or Mercurochrome, and the liquid bandage on top of that to seal. Quite often on minor wounds and ulcers that is all that is needed, and the fish can usually take it from there. This, of course, is assuming you water parameters are very good and that you have eliminated any pathogens that may have caused an ulcer in the first place. Remember that poor water quality can lead to stress, which can lead to possible parasitic and/or bacterial invasion, and finally turn into an ulcer. Ulcers that are caused by bacterial infections are usually a secondary invasion that was brought on originally by poor water and parasites. In other words, with the exception of bacteria like Columnaris, most bacterial infections are the result of other issues in the pond or on the fish.
Sometime in the future I will add more photos of varied ulcers in various stages of infection. This will help you identify problems early on and will go a long way in a successful treatment.
Written by John Fornaro, Hanover Koi Farms. ALL RIGHTS RESERVED BY HANOVER KOI FARMS, COPYRIGHT © 2017