The Science of Water
In this multipart article I will help you to understand what is actually going on chemically and/or biologically in the pond or system in which you house your fish. Most folks are under the false impression that if their water is clear then the water is good. This is so not the case! You need to learn this and learn about testing your water. Simple as that. If you don’t your fish will die!
Now, I know there are some of you out there who have had fish for a number of years, and you may be somewhat skeptical since you have never tested your water or learned what I am about to teach you. There are some reasons you have gotten away with this. Most likely the reasons are the number of fish you have as compared to the volume of water they are kept in. The less fish you house, the more likely you can sneak by without knowing this information, but only for a limited amount of time.
I say a limited amount of time because if you don’t know what I am about to teach you, and you don’t regularly test your water, your pond is like a ticking bomb! It’s just a matter of time before you kill all of your fish pets! It is not a matter of “if” but more a matter of “when” this is going to happen! I even have a sign here on the farm for customers to see. It reads:
Don’t test your water? Fine, I have plenty more fish to sell you when you kill those!
This website has tons of information and articles, but if you only read one article here, THIS IS THE ONE TO LEARN, as this is the heart and soul of keeping fish alive. And out of this most important article, Parts 1 and 2 are the most critical to learn.
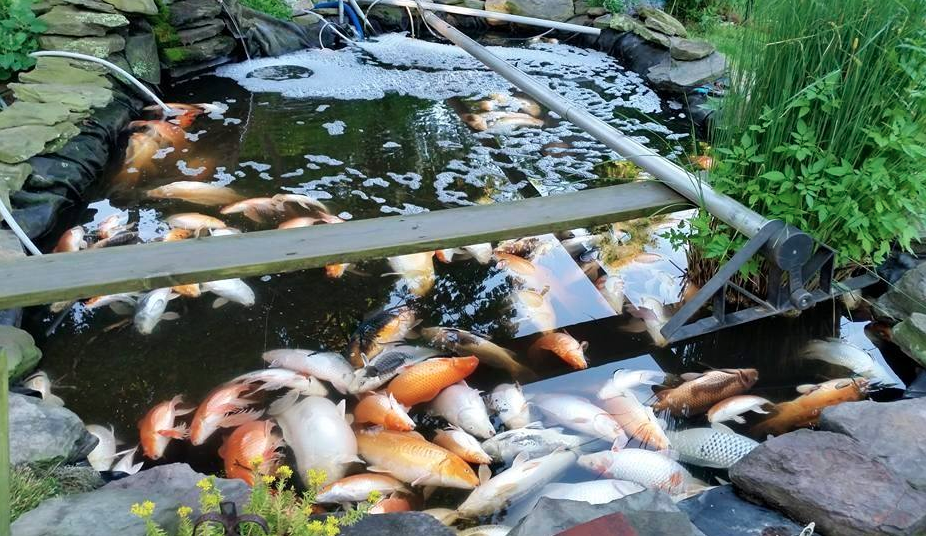
Basic Pond/System Design
There are some basic rules that you must apply when building any pond. It all starts with the total volume of water the pond holds. This is because the number one goal for a fish pond is to have a once an hour to once every three hours turnover rate depending on the size of the pond up to 8000 gallons. What this means is that if you have a 1000 gallon pond, you want to pump at least 1000 gallons an hour through your filtration and therefore have at least a 1000 gallon per hour pump. If you had a 3000 gallon pond you want to pump at least 3000 gallons an hour through your filtration and thus a 3000 gallon per hours pump, so on and so forth. So as you can see the volume of the pond dictates at minimum the size pump you should have. I say minimum because this does not take into account things like head loss, friction loss, etc. that will cause you to lose some of that flow.
For larger ponds from 8000 gallon volumes and up it is acceptable to have a slower turnover rate of once every two or three hours. Many variables come into play such as filter type, filter size, and filter media to name a few.
Now with this known flow rate and pump you now must have properly sized plumbing pipe to accommodate that flow rate safely. The bigger the pipe the more flow it can handle. There are plenty of charts available online to help you choose the proper size piping for your pond plumbing. This is important because if you have too small a diameter of piping and try to pump more water through it than it can safely handle, you will cause extreme and possibly unsafe pressure to build up. This could lead to failure of your plumbing fittings, joints, or the pipe itself. So match your pipe size to your pump flow rate using the available charts online.
With all of the above in mind you must also account for the fact that you may want your waterfall to look like Niagra Falls! In that case you may need even a larger pump to get the aesthetic look you want. It is fine that your turnover is once per hour, but I would not want anything faster than a turnover rate of once per hour through your main biological filter. Anything faster than once per hour turnover will impede your filtration from working properly. This has to do with “dwell time” in the filter. If the water passes through the biological filter too fast the bacteria cannot process the toxins out of the system efficiently if the water is flowing too fast.
Once you have all of this in place you will be well on your way to having a functional design. There is much more to it, however, that is discussed in other sections of this site under pond design. For now this is enough info for you to be able to comprehend the remaining info in this article on why you have filtration, and what is really going on in the water.
Water Testing
In order to keep ANY fish in ANY system they have some basic requirements that they need to survive. Firstly, they require oxygen in the water to breath, and that oxygen must be replenished as they use it. We will discuss this in detail later on.
Secondly, the water needs to be chemically sound for the fish. This is accomplished through proper filtration. You must understand that the fish themselves produce some deadly poisons through their natural bodily processes, and these poisons can build to deadly levels if you don’t have the proper means to eliminate them. The filtration and more importantly the type of filtration is what does this. Other things like pH and kH need to be monitored and maintained at proper levels as well. As a matter of fact, kH is a VERY important compound that needs to be maintained at proper levels, and I would bet that most of you never even heard of it!
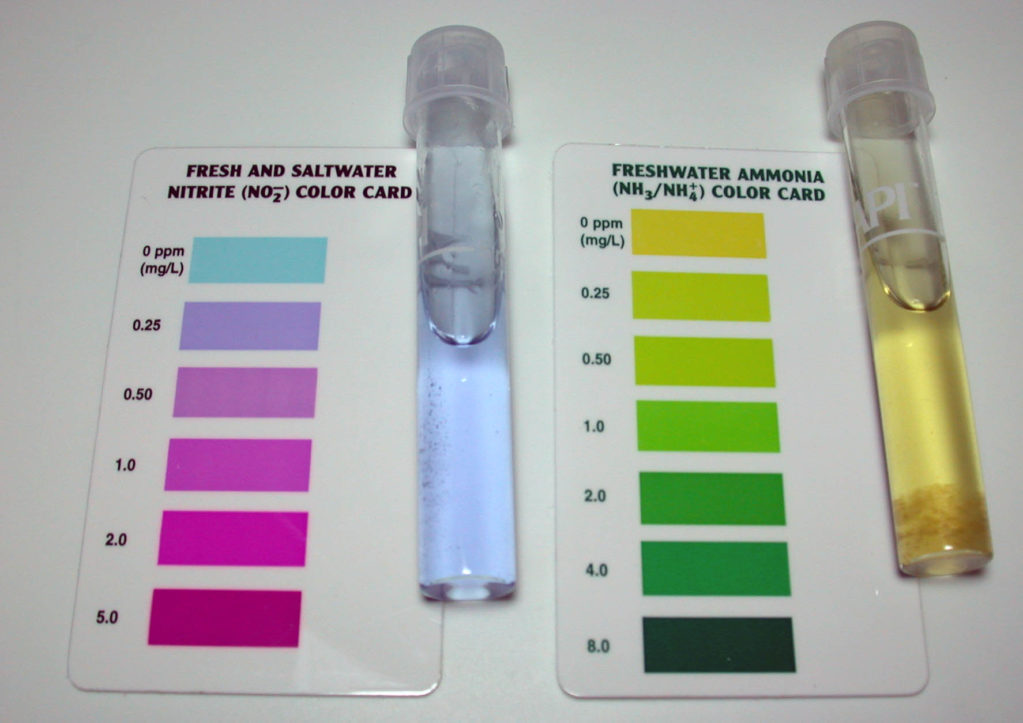
So, as you can see, these things need to be monitored on a regular basis. To monitor them, there are a few simple water testing kits utilized. At minimum, you will need test kits to monitor ammonia, nitrite, pH and kH. Also, you need the PROPER brand of test kits as they are all not created equally. DO NOT USE TEST STRIPS! They are inaccurate in most cases and basically useless. We will discuss each one of these in detail in this article. There are a few others you should have as well, but the previously mentioned ones are the most critical. We sell all the test kits you may need in our online store on this website. They are the best for the money and very reasonably priced.
I cannot stress enough that this simple testing of water is the heart and soul of keeping fish alive and thriving for their complete life cycles. Koi, for example, can live as long as 60 years or more when properly cared for!
Filtration
Most systems we house fish in need at least two of the three primary types of filtration to assure the safety and health of the fish. The three means of filtration are generally referred to as mechanical, biological, and chemical filtration. Most ponds require mechanical and biological at minimum, but chemical can be utilized as well, whereas most aquariums use primarily mechanical and chemical filtration.
Mechanical Filtration
A mechanical filter is simply some type of filter or media which is primarily used to remove or capture solids such as fish wastes, debris, dead plant materials, leaves etc. There are many designs you can purchase or easily make yourself. We will talk about these in detail later in this article. I would like to stress that the REMOVAL of these organics, debiris, and muck from the system on a regular, if not daily basis, is a key element in keeping your fish healthy, and your water pristine.
Chemical
A chemical filter is one which utilizes some sort of Ammonia-absorbing media such as Carbon/Charcoal, or another product called Zeolite, and is less frequently used in ornamental ponds. The Carbon will need to be discarded and replaced, as it will become full of Ammonia eventually. The Zeolite, (which is also much better at removing ammonia than carbon/charcoal), can be recharged after it has become full by placing it in a 30 PPT (parts per thousand) solution of salt water for a period of time. The salt causes the Zeolite to release the Ammonia into the container of salted water. At this point it can be rinsed and reused in the filter.
Since this article focuses primarily on Koi, and Koi are primarily kept in outdoor ponds, the first type of filtration we will discuss in great detail is biological filtration. It is simply not practical to use chemical and/or mechanical alone in this situation, as you will learn.
You cannot discuss biological filtration without first discussing the nitrogen cycle. This is the science behind ALL biological filtration. Because of its sheer importance, I will spend a great deal of time discussing this subject in Part 1
Part 1 - The Nitrogen Cycle
The “Nitrogen Cycle” refers to a natural biological process which occurs in any body of water containing fish, plant life, or any sort of organic materials. This process biologically cleans the water of certain toxins produced directly or indirectly by the fish and/or plants and/or by the decomposition of any organic materials within the system. These toxins are ammonia, nitrite, and nitrate and they are all harmful to your fish. The Nitrogen Cycle is Mother Nature’s way of eliminating these harmful compounds! It does this utilizing what are called nitrifying bacteria. These are a very specific type of bacteria that actually do the work of processing out the harmful toxins.
Understand now that these bacteria will develop in your filter all by themselves given the right conditions, all thanks to Mother Nature and the filtration you supply. I say this because many pond stores sell what they call “beneficial” bacteria, implying that these products are needed to start or enhance the nitrogen cycle.
Snake Oil /Fairy Dust!
THIS IS NOT TRUE! They are simply trying to sell you something you don’t need and that doesn’t work anyway. These so called “beneficial” bacteria are not nitrifying bacteria at all. They do nothing to enhance the nitrification process. So don’t waste your money and don’t patronize places that try to sell you this crap!
So in all of this, a biological filter is one that is designed to house and promote nitrifying bacteria which are a very specific type of bacteria that have some very specific needs. In order to grow and support nitrifying bacteria, the biofilter must be properly sized and must have the proper filter media inside for the bacteria to live on. The bigger the filter, the more filter media you can have, thus the more bacteria you can grow that will process the toxins, and the less likely you will be to experience water quality issues.
The Toxins
The three main toxins mentioned are: (1) Ammonia, (2) Nitrite, and (3) Nitrate, and they all vary in toxicity. I cannot stress enough that understanding this basic concept is the most crucial part of fish keeping, and as such you should read this until you have a good understanding of it.
You will need to acquire individual water test kits to routinely test for each of these compounds. This article will explain the testing process in detail, and give you some ideas on how to create ideal conditions to promote and encourage the nitrogen cycle through proper filter design and, just as importantly, through the use of proper filter media (what you put in the filter).
How it Works
Basically, it starts with the fish, which respire (breathe) and produce the first toxin, ammonia, as a byproduct of their respiration. When the ammonia starts showing up, only then does this promote the growth of a specific nitrifying bacteria colony (Nitrosomonas), which starts to process the ammonia and convert it to less toxic, but still harmful, nitrite. So, nitrite is the waste product of the bacteria processing the ammonia. When the nitrite shows up as a byproduct of the first bacteria, Nitrosomonas, only then does this promote the growth of a second bacteria colony (Nitrobacter), which begins to process the nitrite and convert it to less toxic nitrate. So, nitrate is the waste product of the second bacteria that is processing the nitrite. Nitrate is not very harmful to fish unless it reaches very high numbers. It is easily diluted from the system with water changes. We will discuss this in detail at a later time.
The complete process above is referred to as “The Nitrogen Cycle”. As you can see, the nitrogen cycle and the growing of the nitrifying bacteria does not begin (for the most part) until the fish are in the system and start producing ammonia. The bacteria will not begin to develop until the ammonia shows up. The production of ammonia is what starts the nitrogen cycle, and ammonia production does not begin until the fish are in the system producing it. This is an important fact to understand and that is why I’ve explained it a few times. So let’s talk in detail about this ammonia.
Ammonia must be present for the nitrifying cycle to begin
Ammonia
Ammonia is the most toxic of the three previously mentioned compounds. It can and will kill fish quickly and at minimum cause gill damage. In very basic terms, it is produced primarily by the breathing of the fish, and secondarily by their waste products. It is also produced by the decaying of any organic matter in the water (dead plant material, algae die-off, dead insects, pollen, leftover fish food, proteins, and many more types of organic materials that may be decomposing in the pond).
Any accumulation of ammonia will weaken or kill your fish! As soon as you put fish in the water, ammonia is produced quickly, depending on any plant life you might have and the number and size of the fish. As you might imagine, the more fish you have the more ammonia is produced. Also, how much they are fed and the protein content of that food has a part to play in the amount of ammonia produced. The higher the protein content, the more ammonia will be produced. Any accumulation of ammonia will weaken or kill your fish!
The more food they take in, the more waste is produced, which breaks down to create more Ammonia. This is why you are not supposed to overfeed your fish. It’s not because they will eat themselves to death, but rather that the leftover food will create more Ammonia and/or the more they eat the more wastes they produce, also creating more ammonia.
In general, most fish will stop eating when they are full, and you should feed them enough to keep them healthy. So, it should be said not to overfeed your filter. I usually recommend giving only as much food as the fish will eat in about 1 minute (when they are feeding aggressively), and that they should be fed this way twice daily.
Now, as mentioned above, only when the ammonia shows up in the water does it promote the growth of a certain good, aerobic bacteria, (Nitrosomonas to name one) which, for the sake of keeping it simple, “eat/process” the ammonia. Again, these bacteria start naturally developing ONLY IN THE PRESENCE OF AMMONIA, and since ammonia is their primary “food source”, they require it on a constant basis to thrive and reproduce or they will die off.
These bacteria will grow on any substrate of the pond that is under water all the time, not just in the filter. They will colonize on the liner, filter boxes, pump surfaces, and any and all submerged surfaces. However, these colonies are not generally in sufficient numbers to keep the ammonia at bay and thus keep the water safe for fish. This depends on the fish load (number and size of fish), feed rates, and other factors. This is why we have biological filters, which allow us to grow sufficient numbers of bacteria to be able to keep the water safe for a number of fish. Biological filters greatly increase the surface area available for bacteria to grow on. More surface area means more bacteria, which means much more ammonia can be processed.
A Critical Fact about Ammonia
One last fact about ammonia is that its toxicity level is directly related to the pH and the temperature of the water. This means that the higher the pH value is, the more toxic ammonia becomes. As well, the warmer the water gets, the more toxic ammonia becomes. This is an important fact to understand. If your pH is high and the water is warm this can be a deadly combination and kill fish quickly at even the lowest levels of ammonia. In this scenario, it becomes even more critical to protect the fish immediately with an ammonia binder. Ammonia binders simply change the chemical properties of the toxic ammonia into a non-toxic form. We will discuss the details of this later.
This pH and temperature relationship to ammonia is also critical to help you understand when ammonia is not so toxic, if at all. For example: in winter in temperate climates when the water gets cold, ammonia can be non-toxic to the fish.
You see, in these temperate climates when the water temperature gets below 40 DF or so, most biological filtration ceases as the good bacteria go dormant or die off. This means ammonia can accumulate in the water, since it’s not being processed by the bacteria. However, because ammonia is less toxic at low temperatures, fish can survive through any ammonia build ups that may occur in the winter months. No matter the pH value of the water, if it gets below 45DF the ammonia becomes nontoxic. The colder water actually causes the properties of the ammonia to change and become nontoxic. However, knowing this you must also understand that the opposite is also true: if the water begins to warm due to a warm weather spell during winter, any ammonia will become instantly toxic if the water temp rises above 45. So, in mid-winter, if you have a few days of warm weather, you better test your ammonia levels and add ammonia binder if there is any ammonia. If you don’t, this stress combined with the stress of the colder temps can cause fish to become sick (at minimum), open them up to attack by parasites, and/or kill them.
Understanding this relationship between ammonia, pH and water temperature can also affect when you should or should not increase your kH. You can learn more about this in part 2 of this article.
Nitrite
As stated above, the first bacteria (Nitrosomonas) process the ammonia and produce nitrite. Therefore, when you see the nitrite show up you know that the first bacteria (Nitrosomonas) have started to colonize and are consuming the ammonia and converting it to nitrite. In other words, the only way you get nitrite is if the first bacteria are in there and doing their job converting the ammonia. This gives you a clue as to what part of the nitrogen cycle your filter has reached. When the nitrite shows up in the system, only then does a second good bacterium start to colonize in your system/filter. This bacterium is called Nitrobacter, and it begins processing the nitrite from the water. Again, this is a good thing!
These bacteria tend to colonize more slowly than the Nitrosomonas, so at this point your ammonia should be decreasing and the nitrite increasing. It may take longer for the nitrite to start going down compared to how long the ammonia took to start decreasing. The growth rate of both Nitrosomonas and Nitrobacter is greatly associated with water temperature. The warmer the water is, the faster these bacteria will colonize. Keep this in mind in the springtime when the water is cold. If you live in an area with freezing weather, your bacteria have all but died off and need to re-colonize each spring, and this can take from four to eight weeks to occur. During this time, feed the fish very sparingly, if at all, and only if the water is above 55 degrees and holding.
Now you should understand that nitrite can last for long periods in the pond, so the fish must be protected from it. Again, you need to be testing the water to know the nitrite is there. You can easily protect the fish from nitrite by adding salt ( sodium chloride) to the water. However, you want to keep the bare minimum salinity to accomplish this, because salinity can actually inhibit the bacteria from colonizing in a timely manner.
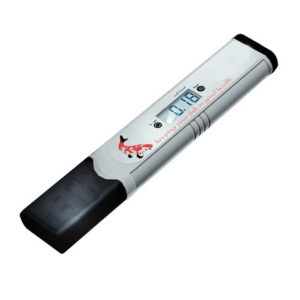
The salinity required to protect fish from nitrite is .002% salt (point zero zero two percent salinity) for every 1 ppm nitrite in the water, or a ratio of 20 to one salt to nitrite. As an example, if you test the water and there is 1ppm nitrite, you need to add enough salt to achieve a .002% salinity. If you read 2 ppm nitrite, then you need to have a .004% salinity and so on and so forth. You will need a salt meter to be able to read the salinity accurately and these meters are available in our online store. If you have a Koi pond then you need a salt meter. Now different salt meters read in different values. Some read in percent salinity, some read in ppm (parts per million ) salinity, and some read in ppt (parts per thousand salinity. We have a salinity calculator in the Koi Treatments section of this website to help you calculate these. Below however you can see what .002% is in these other values and you need this amount to protect the fish for EVERY 1 ppm nitrite;
.002% = 20 ppm (20 parts per million)
.002% =.02 ppt (point zero two parts per thousand)
Remember that you only want the minimum salinity necessary to protect the fish from the nitrite. Put in too much salt and you will slow the nitrogen cycle substantially, and thus have deadly nitrite for a longer time. So get yourself a salt meter.
Now that the second bacterium has started colonizing and processing the nitrite, they too have a waste product which, in sufficient concentration, can also hurt your fish directly or indirectly, and/or cause unwanted algae to grow like crazy. This byproduct is called nitrate, and basically put it is fertilizer.
Nitrate
When nitrate shows up in your system, this is proof that your filter is nearly cycled. In other words, you can’t have nitrate unless the first two bacteria are in there to some degree, and doing their jobs converting the ammonia to nitrite, and the nitrite to nitrate! Got it? Once you see the nitrate, you know your filter is close to or fully cycled.
Nitrate is not much of a concern when it comes to fish health unless the levels are high, above 200 ppm. As part of the Nitrogen Cycle however, nitrate is utilized as fertilizer by plants you may have in your pond. However, in the early spring before your filter has fully cycled and is not producing nitrates, any plants you may have will not do well. There are two reasons for this. One is that it is usually still too cold for the plants to thrive, and the second is because of the lack of nitrates/nutrients being produced. This will change once your filter fully cycles and starts producing nitrates, and the weather warms up. Then the plants utilize nitrate as food and will thrive. Some people will put fertilizer tablets in their plants, not realizing that fertilizer is mainly comprised of nitrate which is (or soon will be) in their system as a normal byproduct of the cycle. Remember though, in early spring your filter has not fully cycled and is producing either no, or low concentrations of, nitrate. During this time, any plants you have may be slow to grow, but just give it some time. Once your filter cycles, it will produce enough nitrates to feed your plants and make them flourish.
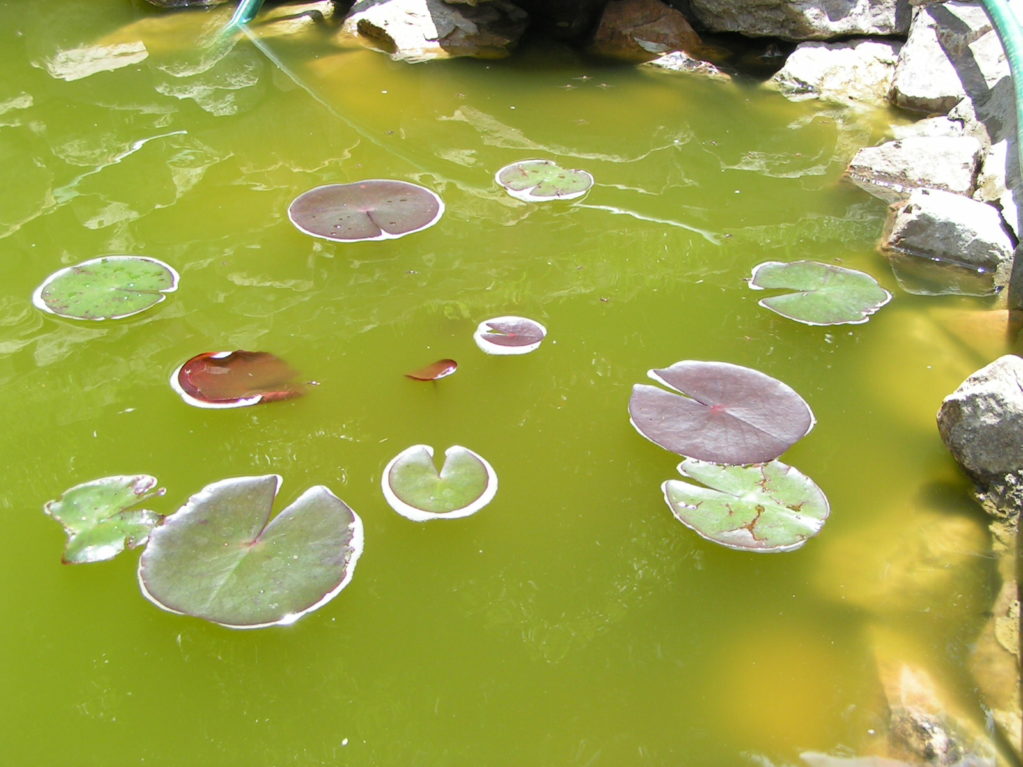
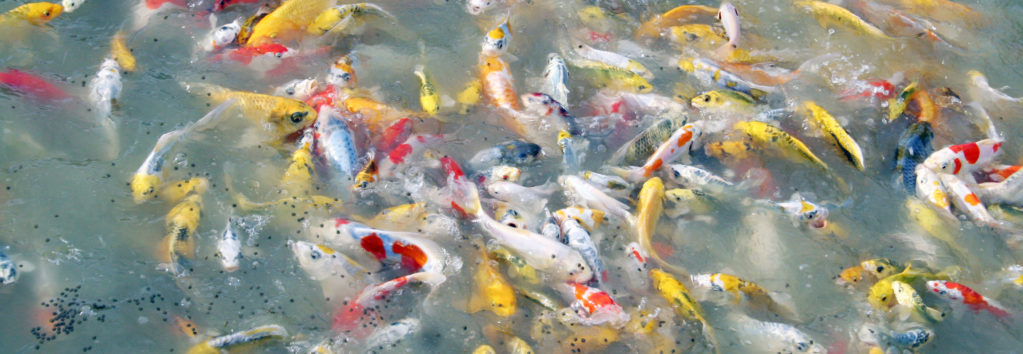
Although nitrates will be removed by pond plants and will help them grow, these nutrients can also contribute to algae blooms (pea soup green water)
I do not recommend that you use any added plant stimulants in your pond for these reasons. If you use these added fertilizer tablets, this will cause an excess of nutrients (nitrates and phosphates) at some point, which will therefore cause an algae bloom (green water) or excess string algae. If you end up with excess nitrates, this can and will contribute to algae problems. Understand that algae is a type of plant, so excess nutrients in the form of nitrate or phosphate will encourage algae blooms. The best means to keep nitrates at safe levels and from causing algae blooms is to do partial water changes in the system to dilute the nitrates out.
The Nitrogen Cycle Summary
Nitrogen Cycle Summary
In testing your water, you may or may not see ammonia in your system, depending on your fish load. This is because even though it is always being produced, it may be only in low numbers and the bacteria are “eating” it as fast as it is produced. Therefore, you may never see the ammonia while testing in light fish load/low feed rate situations. In other words: if you have very few fish and a large enough pond or filter, the bacteria will eat the ammonia before it can build up enough to be detected by your water test kit.
If you get ANY ammonia reading while testing, then you should immediately add one of the commercially available ammonia binding agents. These additives are designed to chemically bind the ammonia to keep it from harming the fish. This will protect them until your filter has grown enough bacteria to eliminate the ammonia through the nitrogen cycle. Keep in mind that ammonia is more toxic as the pH rises so even a small amount of ammonia is deadly at a high pH. Basically, the higher your pH is above 7, the faster you need to fix ANY ammonia concentrations with water changes or ammonia binders! However, I personally would not recommend water changes as a way of lowering ammonia while a filter is still cycling. The use of the additives (ie ammonia binders) as opposed to water changes is much better in this case. The reason is that the Nitrosomonas NEED this ammonia to feed, reproduce, and colonize. If you take the ammonia away they will starve and /or not thrive and reproduce very rapidly and thus won’t sufficiently colonize your filter to process the ammonia produced in your pond. So as you can see, it is a “catch 22”. This is why I usually prefer using these binders instead of doing water changes: because this method still leaves the ammonia available for the bacteria to eat, yet makes it non-toxic to the fish. Also, water changes will only temporarily lower the ammonia levels, and the ammonia will most likely come right back within a 24-hour period. So, you can see that water changes for the purpose of ammonia spikes are almost useless.
If you should use one of these additives you should know that the ammonia will still show up in your water test, but be harmless to the fish. Another thing to keep in mind is that these binders are only good for detoxifying the ammonia for short periods of time: usually three days at most. What this means is that if you add one dose today, and three days later the ammonia is still there, you will have to add another dose. Remember, the additives do not remove the ammonia, they only temporarily detoxify it. As well, each dose is usually only good for a maximum amount of ammonia, and that is usually 1 PPM. If your ammonia is higher than the 1 PPM you will need multiple doses to protect the fish. Make sure to read the directions carefully of the particular binder you are using. With regular testing during this period, you will eventually see nitrite on your test. At this point, you have just received proof that the first bacteria have started colonizing and are doing their job of consuming ammonia.
To protect the fish from the nitrite during this stage, you need to add salt to the system. The ratio of salt to nitrite needed to protect the fish is 20:1. This means you need 20 parts salt to every one part of nitrite in the system to minimally protect the fish, depending on the measurements you use. In other words: if your salt meter measures in ppm then you need 20 PPM of salt solution to every 1 PPM of nitrite in the system, if your meter reads in ppt you need 20 ppt salt to every one ppt nitrite and so on. However sometimes you have a meter that reads in ppm or percentage and the salt test reads in ppm. In this case you need to do the math and convert the readings to all be the same.
To make all of this even easier just forget all the math and use our conversion calculators in the Koi Treatments section of the website.
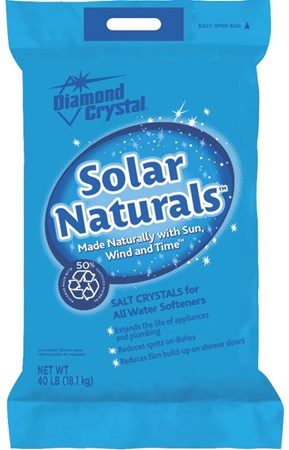
WARNING: YOU SHOULD ONLY USE NON-IODIZED 99% SODIUM CHLORIDE WITH NO ADDITIVES OR PRESERVATIVES, SUCH AS THE TYPE SOLD FOR WATER SOFTENER SYSTEMS. ALSO, SALT AT THESE LEVELS MAY TEMPORARILY STUNT YOUR PLANTS.
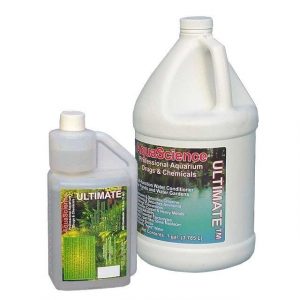
So, if you have plants that you do not want to kill or damage, then instead of salting, simply do enough of a water change to dilute the nitrite out of the system, or use Ultimate Water Conditioner (which detoxifies nitrite as well as binding ammonia). Water changes for nitrite spikes are more feasible than for ammonia spikes, as the nitrite is much slower to accumulate in the system.
As I just mentioned, another way to protect fish from nitrite is to use Ultimate Water Conditioner. This is a great product to protect the fish from nitrite, ammonia, chlorine, and heavy metal toxins. It does it all, and you can find it in the “Water Treatments” section of this website.
As previously mentioned, the second bacteria (Nitrobacter) are slower to colonize and will take at least twice as long as the Nitrosomonas. At some point, however, you should see the nitrate show up while testing. This is when you know these bacteria have started colonizing in your filter, because nitrates are only produced when the Nitrobacter are consuming the nitrites and converting them to nitrates. Get it? There are other nitrifying bacteria like Nitrospira and a few others that also consume nitrite, but for the purposes of this article we will primarily discuss only the Nitrobacter.
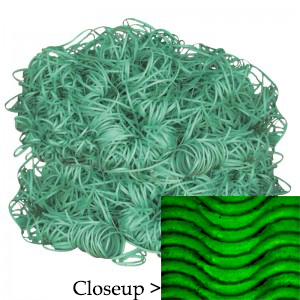
At this point you should be testing daily for all three compounds until at least the point where the ammonia and nitrite readings are ZERO. If you do have plants, they should keep your nitrates at bay. If not, add some more plants and/or do regular water changes to dilute the nitrates. It is common to get nitrate spikes in winter and early spring because your plants are not growing during this time. If they are not growing, they are not consuming nitrates very well. This is a key time to test for nitrates because these spikes will cause algae blooms, be it green water or string algae, as these types of plants do still grow in cold water. In many situations, you will need to do water changes to reduce the nitrate and thus avoid these algae blooms from occurring. Understand that once you get an abundance of algae, it can be difficult to get rid of. Also, once you get an algae bloom of any sort, and then test for nitrates, you will most likely not find any significant levels. The nitrates are there, however, but it is being consumed by the algae as fast as it is being produced. After all, this is why you got the algae bloom, so don’t be fooled if you test after the bloom and find no nitrates. For this reason, it is a good idea to stay up on testing for nitrate so you know when a water change is needed, and you can avoid these algae blooms. One visual indicator of rising nitrate levels is that you will see the carpet algae start growing suddenly. This is the algae that coat the entire pond or system. This is where the long string algae that looks so messy comes from: it’s just carpet algae in advanced stages of growth. Don’t get me wrong, the carpet stage is a good thing for the water and the fish, and you will most likely always have that, but you do not want it to get to the stringy stage. So, look for these growth spurts and you will most likely see the nitrates rising then. This is the latest time to do the water change.
Eventually (in 4 to 8 weeks), your filter should be fully cycled and housing enough bacteria to keep the ammonia and nitrite at zero readings. If not, then there is a good chance your filter is inadequate in some way (too small, not enough media, poor media type, poor circulation, and so on).
One last note: Remember, your filter is housing and growing bacteria, so only clean it when needed, such as when it is so dirty that it impedes the flow of water to the pond, or there is too great an organic buildup. Also, it is imperative to test your pond water on a regular basis. In nature, a fish’s environment is fairly stable due to its size and volume of water in relation to the total fish population. Our ponds, on the other hand, are usually small and overstocked by comparison according to Mother Nature. They are very easily altered chemically by things such as run-off, rain, heat waves, etc. It is for this reason that we have a responsibility to constantly check and maintain the water quality to assure the health of the fish. If you learn how to keep the water healthy, it will go a long way in to helping the fish stay healthy.
Safe Levels
Ammonia: 0 PPM
Nitrite: 0 PPM
Nitrate: 150 PPM or less (preferably 50ppm or less, but this can be difficult depending on your water)
Part 2 - pH & kH
pH
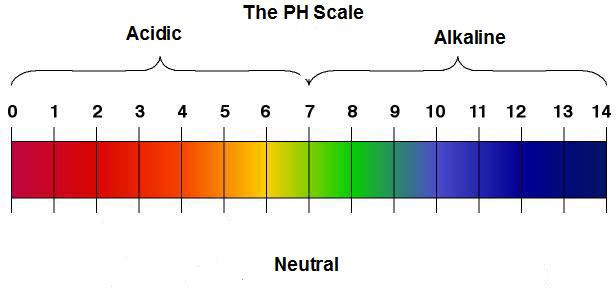
pH (potential of hydrogen) is something most of you have heard of, but I find that most people really do not understand its role in fish keeping, or its direct effect on the fish. pH is basically a measurement of how acidic, alkaline, or neutral your water is, and is measured on a scale of 0-14.
To get even more technical, it measures the number of hydrogen ions on the acid end, in comparison to the number of hydroxyl ions on the alkaline end, with a pH of 7 being neutral. A neutral pH of 7 simply means that there are an equal number of hydrogen ions as hydroxyl ions. A pH of 8 means your water is alkaline compared to neutral, and has more hydroxyl ions than hydrogen ions and so on.
It is also very important to understand that each single digit increase or decrease above or below neutral is ten times more alkaline or acidic than the neutral reading of 7. Therefore, for every single digit change above or below neutral there is a tenfold difference. So, as you can see, any sudden change in pH of one digit or more is a drastic chemical change and could be detrimental to your fish.
Koi and goldfish do best in a pH of between 7.0 and 8.6, but even more important is how stable it is diurnally (over the course of a day).
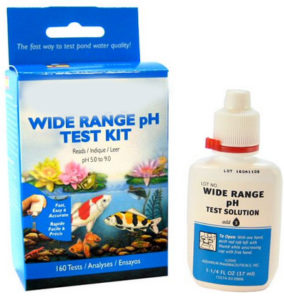
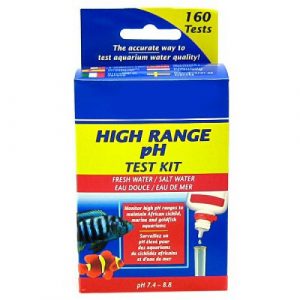
The proper way to check pH is to take two readings. One should be taken in the early morning and the other should be taken in the late evening on the same day and preferably the same weather conditions. In doing so, you should not have more than a .3 (three tenths) difference between the two readings. If your local pond store is any good, you will notice they usually carry different ranges of pH test kits.
There are “wide range” kits which, as the name implies, measure the total scale of pH from 0-14 in one, or half-digit increments Then there are the “high range” kits which, as their name implies, measure a small range of pH above the neutral pH of 7: say 7.4-8.6 only. The “wide range” kits are used to get you an initial reading and to let you know what your pH is in general, but they are not capable of showing you any difference in pH in less than one half-point increments.
In other words, you can only read from 0-14 in one half-point increments. The “high range” kits will narrow the reading down to a smaller scale (once you know the general range your of your pH from the “wide range kit”) and give you more accuracy in smaller increments. This is important for you to be able to measure changes of less than one half point. Remember, you do not want your pH to fluctuate more than .3 (three tenths), so you will need to use the “high range” kit to verify this.
pH of the water is vital to the fish in that the fish need to maintain a given pH level in their blood to stay healthy. By given I simply mean it has to be in the safe range for that species, and above all, the same as the water they live in. Remember how closely linked a fish is to its environment? It IS its environment! As mentioned above, for Koi to be healthy, they need a pH in the range of 7.0-8.6, and more importantly they need the pH to remain stable somewhere in that range. Internally, they are capable of counteracting pH swings, but only to a degree of a three tenths change per day. Ideally, the change should be zero.
If the water becomes too acidic or alkaline, and swings in one direction or the other, the fish have a means of adding acids or bases to their blood to counteract the changes and equalize their internal pH to that of the water. However, they cannot do this very quickly, and they cannot easily counteract a change in the pH of the water of more than three tenths. If the water becomes too acid or too alkaline too quickly, or if the pH goes outside that species’ healthy range for too long, the fish are in danger of getting conditions such as acidosis or alkalosis. Both of these conditions can be detrimental or even lethal to them.
Let’s talk now in detail about what things have an impact on the stability of the water’s pH. Many things, which get introduced into our ponds either naturally or by us, will eventually break down into either acid or alkaline ions and alter the pond’s pH. Also, certain chemical and biological processes that occur naturally in the pond can add acids or cause a change in the pH.
Carbon dioxide from the air, for example, will get into the pond and create carbonic acid, and lower the pH of the pond by adding acids. Also, when fish breathe through their gills, or when any life form in the pond respires, they create carbon dioxide gas. When this gas comes into contact with water it to turns into carbonic acid. Note the word “acid”….so, when this acid is created in the water it will lower the pH. On the other hand, plant life uses up carbon dioxide during the day through the process of photosynthesis and will therefore allow the pH to rise. At night, the reverse occurs. Algae blooms (green water), string algae, carpet algae, and any other form of algae will also raise the pH, because as a plant, the algae also removes carbon dioxide/carbonic acid, and therefore raises the pH. As you can see, plant life plays a major role in changing the pH of the pond. Does this mean plants are bad? By no means. We will get to that shortly.
The “Nitrogen Cycle” in your filter will also affect your pH. During this process, the nitrifying bacteria will release nitric and amino acids as a byproduct of their conversion of ammonia and nitrite, thereby lowering your pH. As you can see, the more activity in your biofilters, the more likely the pH is to swing widely and possibly even “crash” below seven. If this happens, all the fish will most likely die. This is called a pH crash.
Feed protein rates also affect the biofilter activity and the higher the protein, the harder the nitrification process must work. The harder they work the more acids are produced and expelled into the system. The same holds true for periods of lots of plant growth, or an extreme number of water plants in the pond, or algae blooms. The more plant life there is (including any form of algae) the more likely it is that the pH will swing. This is why the pH from one pond to another can be so varied.
The other dangers brought about by all of these acids being produced, is a pH “crash”, as discussed previously. Let’s say your pH runs at or near neutral. Now, think about all of those acids being injected into the pond as discussed above. With the pH being near neutral, you could be in danger of these acid excretions quickly dropping the pH below 7. This is a pH crash, and will kill your fish. This is where we come to the buffering capacity of your water, and its’ kH level.
kH (carbonate hardness or total alkalinity)
As you can see, there are many things that can cause your pH to fluctuate, and most of them will cause the pH to drop. For this reason, it is vital to constantly monitor the pond’s pH when you are not maintaining proper kH. Now. Now, you might be wondering what you can do about all of this if you do see diurnal fluctuations in your pH of more than .3 (three tenths).
That brings us to kH, also known as alkalinity, total alkalinity, and/or temporary hardness. Call it what you want, but in ponding circles it is usually referred to simply as kH, and is, in my opinion, the most important parameter to monitor in an outdoor pond. kH is the buffering capacity of your water, and is usually measured in dKH (degrees of hardness) or PPM (parts per million). As acids are introduced by the varying methods described above, it is the kH (carbonates) which instantly neutralize them and keep them from making your water more acidic and causing pH changes or crashes. Without the proper kH levels to counteract these pH secretions, your pond is a ticking time bomb, and all of your fish are at risk.
These kH is used up each time these acids are neutralized, and it is for this reason that we must monitor and thus adjust its level as needed. We do this by adding carbonates to the pond, and baking soda is what is primarily used to achieve this. We will discuss kH adjustment later in this article. To help you better understand I offer a simple example.
Think of it like this: Pretend the kH level of your pond is a “Tums” antacid sitting there. When acids are excreted (by whatever) into the sytem, the “Tums”/kH instantly neutralize them. Over time, the kH can get used up each time it does this, just as a “Tums” might. If you eat something spicy, and it gives you indigestion, you might take an antacid to get rid of the excess acid in your stomach. If you eat something else spicy after that you will may likely have to take more antacid because the first dose of antacid got used in absorbing the initial acid content up. This is exactly how the kH buffers your water, and you have to understand that there is a minimum level needed to accomplish this. Too small or not enough “Tums” and you will still have indigestion. As stated, the kH will get used up over time and need to be replenished. Therefore, the kH has to be monitored on a regular basis, and you will have to most likely replenish it at various times throughout the year.
Acceptable kH levels for our ponds would be between 100 and 200 PPM depending on many factors as discussed above. If you have lots of pond plants, algae growth, green water, heavy fish loads, and high feed rates, to name a few, then you should try to maintain the higher end numbers between 150 PPM to 200 PPM. In the average pond maintaining a kH of 150 ppm is usually more than sufficient. With this level of carbonate hardness, you should not see very much change in the daily pH values, and you will be protected from the dreaded “pH crash”! It is possible, however, that in times of extreme plant growth in your pond (algae blooms as well) that the pH can fluctuate more than the three tenths, but as long as you maintain the proper kH levels, the fish will be fine.
So, as you can see, you must have a kH testing kit to be able to monitor the kH level, and thus be able to adjust it to the proper level. Many of these kits read kH in a value called degrees of German hardness. So kH can be stated in that or in ppm (parts per million. Both of these values are equally used in the industry. I myself usually use parts per million, and would suggest the same to you.
Let’s say you get a kH test kit and it only gives you your kH readings in degrees of hardness. To convert degrees of hardness to PPM, simply multiply by 17.9. For example, if your kit tells you your kH is 5 in degrees of hardness, simply multiply 5 times 17.9 to get the equivalent in PPM. In this case the PPM would be 89.5 PPM, and would fall in the acceptable range we want.
Remember that your goal is to keep your kH from 100 to 200 ppm at all times. It can be very dangerous to let your kH get below 100 ppm as this is the minimal level for it to be able to do its job keeping the pH stable. I would suggest you monitor the kH weekly and never let it go below 100ppm.
In monitoring the kH levels in systems here at the farm, we usually will let the kH go down to no lower than 100 ppm. At this point we add baking soda in daily increments of 20 ppm per day to gradually get it back up to 150 ppm. This is the high value I personally like to maintain. So, it will usually take a few days to get back to the desired 150 ppm desired range.
Raising kH
If you test your kH and it falls below the minimum 100 PPM, then you need to raise it gradually. This is done by simply adding sodium bicarbonate (baking soda). But, remember the importance of keeping the fish’s environment stable? Well, it is for this reason that you should never raise your kH more than 20 PPM per 24-hour period. For example, if your kH was 40 PPM, you will have to add the baking soda twice over a 48-hour period, with each addition being 24 hours apart, to get it to the minimum 100 PPM.
NOTE: You should recheck your kH reading 24 hours after each addition of baking soda to make sure it is not increasing more than desired due to some sort of miscalculation on your part, such as pond gallonage or baking soda measurement, etc. Also, you must be aware that baking soda has a consistent pH of 8.4, and will raise the pH of your pond 8.4 if it is below that. Also, be sure to check the ammonia levels in your pond before the addition of baking soda. Ammonia becomes much more toxic as the pH rises above the neutral reading of 7, so if you have any ammonia in your pond I would not recommend the addition of the baking soda until you get the ammonia to 0 ppm.
The general rule of thumb for increasing your kH is by 20 PPM increments every 24 hours, by adding ½ cup of baking soda per every 1,000 gallons of pond water. For smaller volumes you would add about 1/4 TEASPOON for every 10 gallons of water to raise the kH 20 PPM. Remember, however, to recheck your kH and pH 24 hours after each addition. It is also wise to keep an eye on your fish for any adverse reactions during this period, but if you have calculated correctly, there should be none. You would have to be off tenfold to really see a negative reaction from the fish.
A Note on Raising the kH
Remember the relationship between ammonia toxicity and the pH value back in the nitrogen cycle part of this article? Ammonia becomes more toxic the higher the pH and water temp rise. Well, understand that when you use baking soda to adjust your kH it may raise your pH level. You see baking soda itself has a ph of 8.4 (8 point 4) which is fine in itself and within the acceptable range for Koi. So when you add the amount of baking needed to raise your kH to the desired level, it will most likely raise the pH to the pH of the baking soda which is 8.4.
Each pond or system is different as to its natural pH level. There are tons of variables that affect where your system pH naturally falls. Just know it is critical for Koi that the pH always be above 7. Below this point and you are in grave danger of a pH crash as discussed previously. So in understanding this, also understand that adjusting the kH using baking soda will take the pH to 8.4 if your ponds natural level is below this. Basically,you can potentially raise you pH when raising your kH.
This is where the ammonia comes in. If you have any degree of ammonia in your pond you do not want to raise your kH at this time. You must first add an ammonia binder to convert the ammonia to a non-toxic form. Only then can you proceed in raising the kH. Otherwise by raising the kH you could be potentially raising the pH and thus making any ammonia in the system more toxic instantly. This is also one reason we only raise the kH in 20 ppm increments per day. Also, because raising the kH can possibly raise the pH we don’t want to do that part too quickly either. Remember, quickly changing the pH can harm the fish.
So to sum up, keep your kH between 100 and 200ppm using baking soda. Add only enough baking soda to raise the kH 20 ppm per day. Do not raise the kH when there is ammonia in the water until you first add an ammonia binder to make the ammonia non-toxic.
A Note on testing kH
Here at HKF we sell a very reliable and inexpensive set of water testing kits. They are some of the best found on the market and made by API/Pond Care. This is about the only good thing this company produces though, so don’t buy any other products from them.
As stated, they are great kits, but the directions can be confusing to some. This is especially true with their kH test kit. Whomever wrote these directions couldn’t have made it more confusing if they had tried. In their defense, I will say, however, that it is a little difficult to explain in writing So let me try and clear this up for you.
Each API kH kit comes with a glass vile with a line on it and one bottle of kH reagent solution. Simply fill the vile to this line with the water to be tested. No more, no less. Now put one drop of the chemical reagent in the vile with the water, put the cap on the vile and gently mix. One of two things will happen at this point. The water sample will turn an ugly yellow or it will turn bluish. If the sample turns yellow, this means you have zero kH level. At this point you are done with the test and you need to increase your kH as described above using baking soda.
Now the other thing that can happen when you add the first drop to the vile is the water can turn bluish. If this is the case it’s telling you that there is some kH level in the water sample. Now, however, we need to figure out just what the end reading will be. So after the first drop is added and mixed, simply take the cap off and add a second drop of solution to the water sample. If it stays blue you will simply repeat these steps by adding one drop at a time, capping and gently mixing until the sample turns yellow. While doing these steps, you need to keep count of the number of drops you are adding including the very first drop and up to the drop it turns yellow.
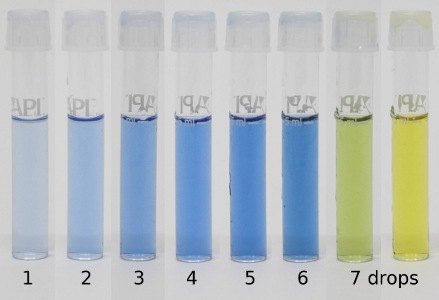
As an example: let’s say you add the first drop to the sample water. The water turns bluish after capping and gently mixing. That’s drop #1. Now add the second drop to the vile, cap and gently mix again. Let’s say that the water sample stays blue with the addition of the second drop. Repeat these steps until whatever drop the water turns yellow. If, for example, it took 5 drops for the water to go from blue to yellow then this means your kH is 5. More accurately 5 degrees of German hardness.
So, understand that the blue coloration is simply telling you that your sample does contain some kH, and how many drops afterward it takes to turn it from blue to yellow tells you exactly how much kH it contains.
As stated, we normally refer to kH in values of ppm (parts per million) To convert the reading of 5 drops/5 degrees of German hardness to ppm, you simply multiply the number of drops it took by 17.9. This will convert the DGH to ppm. In the case of this example 5DGH is 89.5 ppm. You can also simply say your kH is 5 drops as many folks do. Simply huh? lol
In all of this you know you want a minimum kH of 6 drops, or 6 DGH or 107.4 ppm. never let the kH go below this level.
Part 3 - More About Water Quality
Oxygen/O2
Just like humans, fish require oxygen to survive. The difference, however, is that fish get their oxygen from the water. They do this with the gills. The gill filaments extract the O2 from the water as it passes over the gills. This is the simple explanation and we will leave it at that. This section will help you to understand the relationship between the fish and their oxygen requirements as it relates to our ponds and tanks.
You must understand that as the fish breathe the oxygen in our ponds and systems, that oxygen is gone until something replaces it. For example, if you put a fish in a small bowl of water, it would not be long before all the oxygen that was contained in that water gets depleted by the act of the fish respiring/breathing. The fish would then begin to slowly suffocate unless something was replacing the O2 used. In other words, you better be replacing at least the amount of O2 being used or you will be fighting a losing battle. There are certain species of fish like Beta’s/fighting fish that you see kept in those tiny fish bowls with no aeration and no filtration. Fish like these are the exception as they have a means of breathing the air outside of the water with specially adapted lungs. Most fish, Koi included, do not have these special lungs and therefore do not have the ability to breath air outside the water column.
O2 Levels Change
The oxygen level varies in water based on a number of variables. As stated, the fish are using O2 while breathing , but also plants (including algae) use O2 at night, and the biological filter nitrifying bacteria also consume O2. So as you can begin to understand, you must have some sort of O2 generation to replace the O2 being consumed by all of these living things in the pond. In all of this you must also understand that the more fish you have in a given body of water the more O2 is being consumed. The same holds true for the amount of algae and plants. The more you have, the more O2 is depleted.
Water can gain oxygen by movement, for example. As a stream flows it gathers oxygen from the surrounding air. Wind blowing across the surface of water does the same thing but in reverse. Instead of the water moving through the air and gathering oxygen, the wind moves across the water surface and the O2 is added there. This action also adds O2 to the water, but as you can imagine the latter is not as efficient as moving the water through the air. When it comes to our ponds we utilize waterfalls, streams and air pumps with airstones to move the water and/or add O2 to the water.
Important Stats About O2 in Water
Before going any further there are some things you really need to understand about the relationship of O2 and the water. Water can only contain a given amount of O2 based on some variables. Things like water temperature and salinity play a major role in how much O2 water can take in or hold within. Lets discuss the temperature as this plays the biggest role.
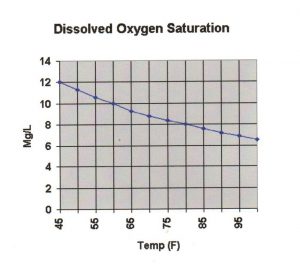
When water is holding all the O2 it is capable of holding due to water temperature and other variables, this point is called the saturation point. Our goal is to always achieve the saturation point in our systems and ponds. Again, this simply means the water is as full of O2 as it can physically be at a given temperature. The warmer the water is, the less O2 it can hold, and thus the cooler water is, the more O2 it can hold. Many species of fish need at least 5mg/l of O2 to survive, but this is the minimum. It would be best to have more. Again your goal is to be at the saturation point for that temperature. Look at the graph below and you can easily see this concept in action. For example, you can see that at 45 degree water temp the saturation point is 12 mg/l. At 60 degree water the saturation is less and only 10 mg/l. So you can easily see that as the water warms the less O2 it can hold, and thus the lower the saturation point.
How Saturation Applies to Fish
So what we know so far is that water at a given temperature is only capable of holding so much O2 as shown in the graph above. We also know that the more fish you have the more O2 is used. It is also true that the larger fish require more O2 than smaller fish. Remember as well that plants, algae and biological filtration also use available O2. Now let’s apply all of this to our ponds.
Fish are cold blooded creatures. This means that their metabolic rates are controlled by the water temperature. The colder the water the less active the fish. The warmer the water the more active the fish. So when the water is warm the fish’s activity increases and thus so does their demand for O2. In cold water their activity decreases and thus their demand for O2. You may have noticed that this seems to be a flaw in Mother Nature. When the fish need more O2 in warmer water there is less O2 available to them!
Basically put, you need to be concerned when water temperatures start to increase above 85 DF, but if you have green water algae, and/or lots of plants in addition to the warm water you could be in danger at even a lower temperature.
As you can see from the graph, at 85DF water temperature there is only about 7.5 mg/l O2 available to the fish. This is barely above the minimum of 5mg/l that the fish need to survive! If you now add the demand for O2 of the plants, algae and biofiltration you could be getting below the needed minimum! So when the water temps get high you want to increase your aeration or add more.
How to Add O2
A properly designed average pond normally has some sort of water feature like a waterfall or stream. These features are not only there for the aesthetics. They act as a means of moving the water and therefore adding O2 as a bonus! We have learned that moving the water through the air adds O2 to the system, but in addition to this some of these water features will also cool the water as it flows through the air. As the water cools it increases the saturation point and thus allows more O2 to enter the water. So as you can see, these water feature have a two-fold positive effect on O2 levels in the water.
With this said, most ponds that have properly designed turnover rates, flow rates waterfalls, streams etc. will seldom have O2 issues and always be at saturation. However, the possibility of O2 depletion is still there depending on all the variables involved. For example, if you have tons of fish including large ones, green water, lots of plants, and the water is hot, then you could have an issue. You have to understand that if the water is hot it is only capable of holding so much O2 as the graph above shows. Well, this may not be enough for your conditions in this example. In this case even if you added an air pump and airstones, the O2 put out by that device cannot enter the water column because of the water temperature being so high! The water is already at saturation! In this situation you would be better off adding a pump to the pond in a shallow area that would simply shoot the water straight up and out of the pond in such a way that the water falls right back into the pond. Think of it like a homemade fountain of sorts. With this action you are not only adding O2 by shooting the water through the air, but more importantly you are cooling the water to allow it to hold more O2! I hope you can understand this concept.
Plants/Algae & O2
Previously we discussed how plants and algae use O2, but now let’s discuss the details.
Any type of plant, including any type of algae, consume O2 at night under the cover of darkness. More accurately, they consume O2 during the lack of sunshine/light. Let me explain:
During the day all plants produce O2 during the process of photosynthesis. Any plant in contact with the water will transfer this O2 to the water column. So you can imagine a submerged plant like any type of algae will add the most O2 to the water as compared to other types of marginal plants that only partially make contact with the water. This is why some sellers of fully submerged water plants like elodea and such advertise them as “oxygenators” This is yet another example of twisted and partial science being used for marketing purposes. These plants are by far not oxygenators and here is why:
While all plants produce O2 during the day, the part these “oxygenators” sellers left out is these same plants consume O2 at night! As a matter of fact, a fully submerged plant will take more O2 from the water at night than it puts out during the day! The same holds true for any plant or algae in the water. This is why most times you will not experience O2 depletion issues during the day to the point you see adverse affects on the fish. At night, however, is a whole other story!
O2 Summary
So knowing that plants and algae consume O2 you can understand that this is the time when fish are in most danger of low oxygen levels. With this in mind, during times of rising water temperatures when the water saturation is at its lowest you should pay particular attention to your fish at night. If you ever experience dangerously high water temperature one way to monitor your fish with this in mind. For example, the O2 levels in any pond are at their lowest just before first light in the morning. All night long plants and algae are consuming oxygen. Add the fish to this as well as biological filtration, and you can understand the danger. Remember, once the sun rises the O2 levels will start to rise most likely because the plants add O2 to the water during the day.
So during the hottest of weather check the fish in the early morning before sunrise for signs of O2 distress. If levels are too low the fish will be gasping at the surface. With this gasping action the fish are actually taking in a half a mouthful of water and a half a mouthful of air with each gasp. They then mix the two just before it passes over their gills. As you can imagine this is not a very efficient means of them getting the O2 they need, but they do this as a last resort.
Algae
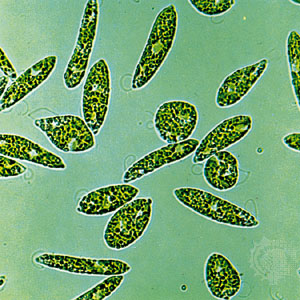
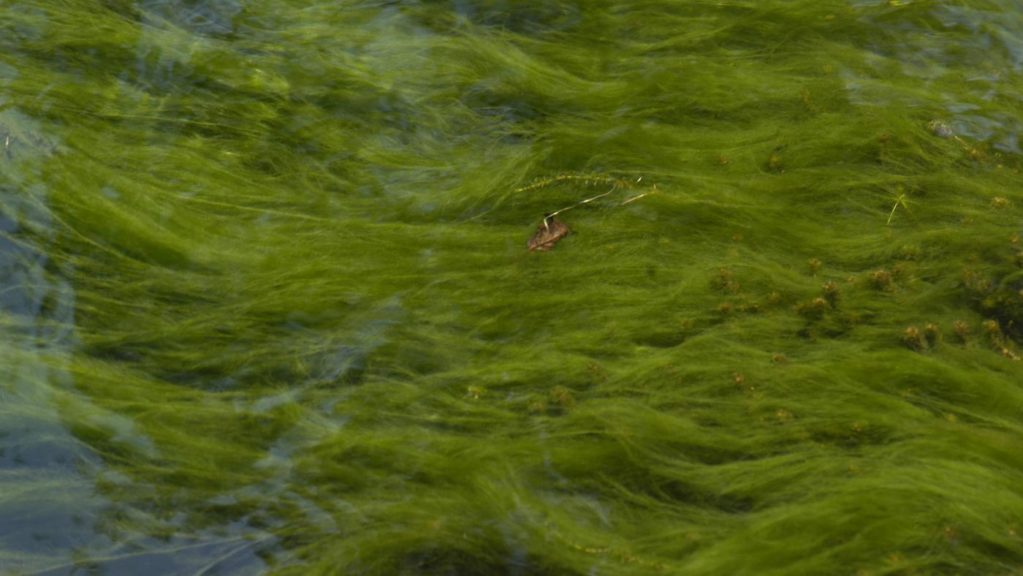
In liner type ponds, there are generally two types of algae that can become problematic. The first and most common is planktonic algae. These are microscopic type that bloom and make your pond water green. The second is string algae that grows attached to the bottom of the pond, in streams and on waterfalls. When it is short we refer to it as carpet algae. When it gets long and hairy-looking we call it string algae. It is all the same algae, however, but can look different depending on the growth/length. This type has very fine filaments that can grow from the bottom and can get quite long. These filaments often break apart and can cause quite a mess in the pond and filters. This type of algae has many forms and variations. Another common form is a messy glob that forms on rocks, waterfalls and in the streams. None of these are very detrimental to fish, and can even be a good thing for them when not in excess. All plants, be it algae or decorative aquatic plants, can have a positive function. During the daytime, they can and will create oxygen in the water. This is a good thing. HOWEVER, at night they stop producing oxygen, and actually steal oxygen from the water and therefore the fish. So, excess plant life and especially algae can cause an oxygen depletion at night and especially the warmer the water gets. As you can see, too much algae or too many aquatic plants could become a detriment. Also, any form of plant life adds to your bio load/organic load and cause more work for your biofilters. String algae is just plain ugly in the pond. So, if carpet algae starts to get some length on it and becomes string algae, stop feeding the fish and they will eat it back down to a short length. Yes, your fish can mow your grass in the pond!
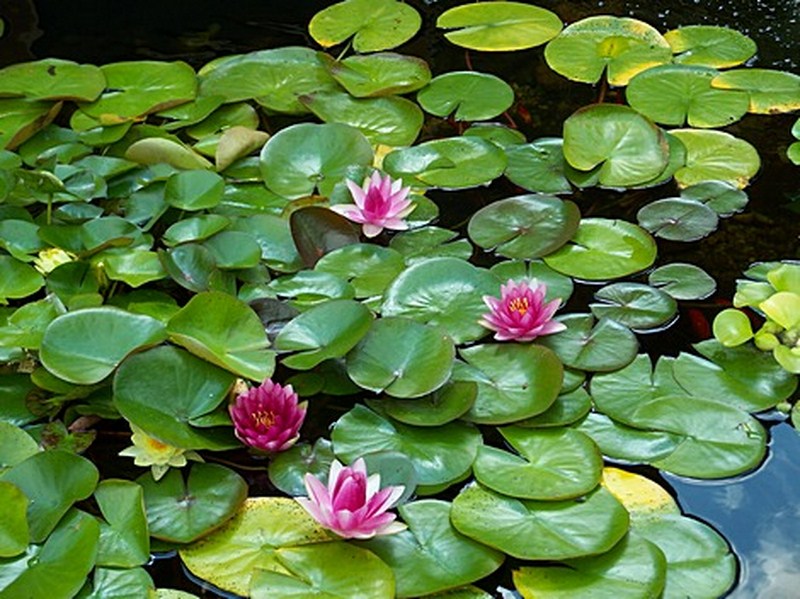
Decorative and Aquatic Plants
Many of us like decorative plants in the pond. However, they can be difficult to keep because Koi love to eat them and root through them. This is especially true the older and larger Koi get. Even if you can keep the Koi from eating them, you must understand that plants in the pond have pros and cons. As stated above, plants give off oxygen during the daytime, but at night they can consume oxygen. So too many plants can cause oxygen problems. This is especially true when water temps start getting into the 80’s when the water only holds low oxygen to begin with.
Many folks are misled to believe that plants aid in the filtration of the pond. This is only partially true. Yes, plants to help uptake excess nitrates in the system and this is a good thing because excess nitrates can lead to algae problems. However, plants greatly add to the organic and bio load of the system. Any dead plant material- leaves, etc., all break down in the system and can cause problems, both aesthetically and from a bio filtration standpoint. Also, the soil that the plants live in create anaerobic (oxygen deprived) conditions: an ideal environment to grow bacteria that carry fish pathogens. So you see, plants must be kept in check so that you get more benefits than detriment. Too many plants cause issues, so it is important to keep a balance. This and other reasons are why bog type filters are not good. They simply bring more problems and poor conditions than they do help with filtration. Bottom line: it is fine to enjoy some plants (if you can keep the Koi from eating them) as long as you keep them to a minimum. This is one reason I use the floating type plant islands in my pond to house plants. They keep the fish from eating the plants, plus they eliminate the anaerobic conditions that come with pots and soil.
NO GRAVEL IN THE BOTTOM OF THE POND!!!
Probably my biggest issue with Aquascape and other such pond designs is the gravel they put in to cover the entire bottom and plant shelves. When a pond is built this way, it is nothing more than a septic tank! EXTREMELY UNHEALTHY for the fish and YOU.
You see, all the fish wastes, dead plant material, leaves, dead bugs, etc. all end up in this gravel. Over a very short time this gravel is barely visible because it gets full of, and covered by, all these waste products. First, it looks like crap! Second, when this occurs, this biological muck becomes an anaerobic bacteria factory and parasite nursery. Anaerobic bacteria are not good, as they carry fish pathogens that can and will attack your fish.

These bacteria need no oxygen to survive and they actually thrive in a low to no oxygen environment. They end up there because of the muck because this is what they live on for food. Yes, they consume and process this muck, and one byproduct of this action is hydrogen sulfide in gas form. Aquascape talks about this as if it is a good thing! It’s not!
This gas gets trapped in this muck layer and, in time, releases as bubbles which rise to the surface and dissipate. Hydrogen sulfide is highly toxic to fish and is responsible for killing more fish than almost anything else in the pond. This is especially true in winter.
In winter, this regular gaseous release gets inhibited when ice closes off the surface of the pond. When this happens, the trapped gas can and will kill most of the fish, especially the larger fish. This is why it is critical to keep a hole in the ice directly over the deepest part of the pond where the fish usually live all winter. That slightly deeper water is a tad warmer than the shallower water, so this is why the fish live in the deeper spot all winter.
Companies like Aquascape and other pond builders twist this science by saying the muck never accumulates to dangerous levels because these anaerobic bacteria are processing it out. Well this is simply not true because of the sheer amount of muck that forms in this gravel cannot be quickly processed by the bad, anaerobic bacteria. It is a slow biological process. AND, remember, these bacteria carry fish pathogens that WILL hurt your fish in time.
So, as you can see, the number one thing you want in a pond and filtration system is muck removal on a continual basis. You want zero muck accumulation, or at minimum you need a design that allows for easy and regular removal of it! Gravel in the pond simply does not add anything good, other than allowing the contractor to “slop” the liner in without any concern for wrinkles and such. This saves them time, but creates a very poor design. DO NOT ALLOW YOUR POND BUILDER TO PUT GRAVEL IN YOUR POND! If you already have it…REMOVE IT!
Some Basic Rules of Thumb
Now, let’s discuss some general rules of thumb in fish keeping — the first being fish stocking levels.
Fish Stocking Levels
There are many variables that determine fish stocking levels, and they change from situation to situation. There is simply no way to say exactly how many fish a given system can house due to all the variables involved. However, if you test your water and have even a basic biofilter, there are some basic ranges we can discuss. For the average watergarden hobbyist, they range from one fish for every 25 gallons of water to one fish for every 1000 gallons of water. I can say that in general, and overall, less is better.
For the average beginner, I usually recommend no more than one fish (any size) for every 100 gallons of water, and this would actually be considered a considerably high stocking rate to some. You can even have more than this, but only after you know and understand the Nitrogen Cycle, as well as do what is required to accommodate the higher stocking rate (larger filter, frequent water changes, more filter media, and, most importantly, frequent water tests). Basically, once you are proficient at maintaining superb water quality, you can have as many fish as your filter can handle. As long as you always have zero ammonia, and nitrite, you can be sure that the filter is keeping up. Keep in mind, however, that overstocking fish, even though your water quality may be good, will make the fish more prone to other problems, such as disease. Once you start getting above the stocking rate of one fish for every 100 gallons, you are entering into the world of intensive aquaculture. In this world, there are simply acceptable levels of fish losses due to overcrowding. So keep this in mind. We will talk about this in another article.
The second very general rule of thumb is:
For every 100 gallons of pond water, you will need at least one cubic foot of filter media. This amount of media will give you enough surface area to grow the amount of bacteria required to keep the toxins in check, given that you are somewhere close to the first rule of fish stocking levels. Remember though, that you can never have too large a filter, but you can have one that is too small. In the case of filters, “SIZE MATTERS!” The type of filter media is also extremely relevant in all of this as well. Some media simply outperform others for a multitude of reasons to be discussed.
Written by John Fornaro, Hanover Koi Farms. ALL RIGHTS RESERVED BY HANOVER KOI FARMS, COPYRIGHT © 2017